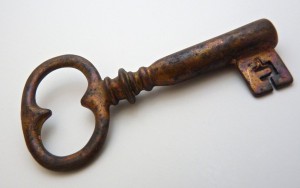
I have family and friends who are terrific at making some really cool stuff. And while much of it looks great in situ, sometimes I want to take a photo that shows something off all by itself, with no background to distract the viewer from the subject of the photo. You know, like this:
To do this sort of photography, you need something called a light box. The key ingredients of a light box are a seamless background and bright, diffuse lighting. You can, of course, buy a commercial one for $100. But with a quick trip to the hardware store, you can build one yourself very cheaply.
Here’s what you’ll need to build this project:
- 1 10′ 3/4″ length of PVC pipe
- 4 90° 3/4″ PVC elbow socket fittings
- 4 Tee 3/4″ Tee elbow socket fittings
- 1 white posterboard
- 1 white sheet
- 1 lamp with daylight bulb
- tape
Once you’ve got these pieces, start by cutting the 10′ PVC pipe into the following lengths:
- 6 11″ lengths
- 4 2″ lengths
- 2 21″ lengths
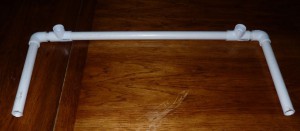
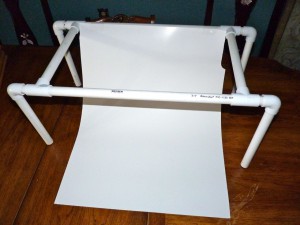
Once you’ve cut the pipe to the above lengths, piece together one of the long sides by fitting together the following pieces in order: an 11″ segment, a 90° elbow socket, a 2″ segment, a tee socket, a 21″ segment, a tee socket, a 2″ segment, a 90° elbow socket, and an 11″ segment. Rotate all the bits to look something like this (click for more detail):
Friction should be enough to hold the parts together — you shouldn’t need to use any PVC cement. Once you’ve done one of these, do another exactly like it.
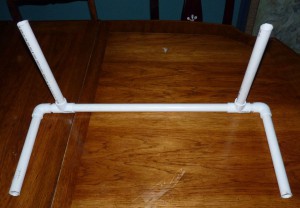
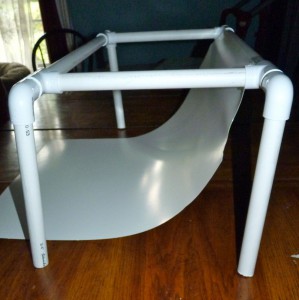
Now that you’ve got the two sides built, take the remaining 11″ segments and fit them into the openings on the Tee sockets, like so:
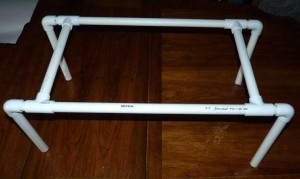
Finally, take the other side and fit its Tee sockets to the 11″ segments you’ve just added to side 1. Flip the box onto its feet, and you should have the frame for your lightbox, ready to go:
Now that your superstructure is complete, use the tape to secure the short edge of your posterboard to one of the long 21″ segments along the top of the frame. Allow the posterboard to hang down and to bend naturally, providing a flat surface and a background with a smooth transition between the two:
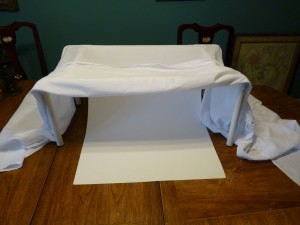
Now that you have the frame and background in place, simply drape the sheet over the frame. When it is between your subject and your light source, the sheet will act as a light diffuser.
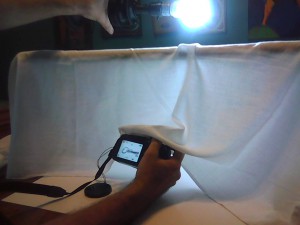
Now that you’ve got all the parts in place, put your subject on the flat part of the posterboard, grab your lamp in one hand, your camera in the other, pull the front of the sheet down, and start taking some pictures!
Some things to try:
- Move your light source around. While the sheet helps diffuse the light, the general angle from which it’s coming can still make a fair bit of difference in how your subject looks.
- Experiment with light colors. I suggested a daylight (5500K color temperature) bulb to start with, as it will keep you from having to mess with your color balance too much, but it’s possible to get interesting effects with other colors as well.
- Try multiple lamps. Having more than one light source can make the lighting even more diffuse, or if you use lights with different colors, can bring out the angles of your subject more obviously.
- Take off the white posterboard and try black or another color.
- Use a light source with a reflector, like a work light or floodlight. This will help your lighting be both brighter and a bit more diffuse.
If you decide to dive into this project and have any questions, drop me an email and I’ll do my best to help out. Have fun!
UPDATE: A note from my friend Jonathan Ireland, who is a far more accomplished photographer than I am: “Re: #2, if you are aiming to achieve neutral, and your camera supports manual whitepoint adjustment, simply read the lit white background first to set the whitepoint. use the dull side of the posterboard for less glare.”
UPDATE 2: You can also see some more photos taken with this light box rig in my album Liam’s Shop of Horrors.

